


Packing a kitchen without breaking anything comes down to three rules: wrap every fragile item individually, pack plates vertically like records, and fill every empty space in the box. Start 3 to 4 weeks before moving day and work through the kitchen category by category, from pantry items first to daily dishes last. With the right supplies and a clear system, your cookware, glassware, and appliances will arrive at your new home in one piece.
Key Takeaways
- Start 3 to 4 weeks early — begin with least-used items like holiday bakeware and specialty gadgets.
- Pack plates vertically (like records in a crate) to dramatically reduce cracking under pressure.
- Use dish-specific double-walled boxes for fragile items and fill every empty gap with crumpled packing paper.
- Label every fragile box with “Fragile — This Side Up” so movers handle it correctly.
- Pack an Open-First essentials box with plates, cups, and utensils you will need right after arrival.
Why Is the Kitchen the Hardest Room to Pack?
The kitchen is consistently rated the most challenging room to pack because it contains the most diverse mix of fragile, heavy, bulky, and oddly shaped items in your home. You are dealing with delicate stemware, ceramic dishes, sharp knives, bulky appliances, and open food containers all in one space.
According to a moving industry survey, nearly 48% of people reported that at least one item was damaged during a house move, and fragile kitchenware was among the most common casualties. Another study by Duck Brand found that 75% of movers say poor-quality packing supplies directly caused damage during their move — making material choice as important as technique.
“The kitchen is the room where most moves go wrong. People underestimate how many wrapping materials they need and rush the process. When you give the kitchen the time and supplies it deserves, it is actually one of the most satisfying rooms to pack.”
— Heather Hammond, Senior Manager, Packing Tapes at Duck Brand
The good news: a room-by-room, category-by-category approach removes the overwhelm. Start early, follow a system, and you will arrive at your new Green Bay home without a single cracked plate.
What Supplies Do You Need to Pack a Kitchen Without Breakage?
Before you pull a single dish from the cabinet, gather your packing materials. Most people underestimate how much they need, especially for wrapping paper and bubble wrap. Running out mid-pack leads to shortcuts that cause breakage.
Boxes: Which Sizes and Types to Get
Choosing the right box for each category of kitchen item is one of the most important decisions you will make. Here is a practical breakdown:
| Box Type | Best For | How Many |
| Small boxes (10″ x 12″ x 10″) | Canned goods, cast iron, small appliances | 10 to 15 |
| Medium boxes (18″ x 18″ x 16″) | Pots, pans, pantry items, kitchen gadgets | 10 to 15 |
| Dish pack boxes (double-walled) | Plates, bowls, mugs, fine china, glassware | 3 to 5 |
| Large boxes (18″ x 18″ x 24″) | Lightweight bulky items like plastic containers | 5 to 7 |
Pro tip: For a family-sized kitchen, plan on 30 or more boxes total. Always buy 10 to 15 percent more than you think you need.
Wrapping Materials: Paper vs. Bubble Wrap vs. Towels
Each material has its place in a kitchen pack:
- Packing paper (ink-free): Best for plates, bowls, and most dishware. Use at least 15 lbs of it.
- Bubble wrap: Reserve for highly fragile items like wine glasses, stemware, and ceramic pieces.
- Kitchen towels and dish cloths: Excellent eco-friendly padding between pots and pans — they do double duty by filling space in boxes.
- Stretch wrap (plastic wrap): Ideal for keeping flatware sets together and securing lids to pots.
- Packing tape and dispenser: Use a heavy-duty tape that will not fail under the weight of dense kitchen boxes.
“People often grab whatever boxes are free from the grocery store, but those are not designed for moving. Dish pack boxes with double walls are worth every penny when you are transporting fragile items over bumpy roads.”
— Chris Monroe, Moving Consultant at Alliance Moving Services

How Do You Pack Dishes and Plates Without Breaking Them?
Dishes and plates are the most commonly broken items in any kitchen move. The reason is almost always the same: they are packed flat and stacked horizontally, which puts pressure directly on the weakest part of each plate. Here is how to do it right.
The Vertical Plate Method (and Why It Works)
Packing plates vertically — like records in a crate — is the single most effective technique for preventing breakage. Plates are structurally strongest at their edges. When stacked flat, the weight from above concentrates on the center, which is where cracks originate. Standing them on edge distributes pressure evenly around the rim.
Follow these steps for every plate:
- Line the bottom of a dish pack box with 2 to 3 inches of crumpled packing paper.
- Lay one plate in the center of a large sheet of ink-free packing paper.
- Fold all four corners toward the center, covering the plate completely. Secure with tape.
- Repeat with a second sheet for plates that are thinner or more delicate.
- Stand wrapped plates vertically in the box, side by side. Do not lay them flat.
- Fill gaps between plates with crumpled paper so nothing can shift during the drive.
- Top the box with another 2 to 3 inches of crumpled paper before sealing.
- Label the box: “Fragile — Dishes — This Side Up.”
Weight rule: Heavy dinner plates go in first, standing vertically. Lighter salad plates and saucers stand behind them.
Packing Bowls, Mugs, and Fine China
Bowls follow a similar logic to plates but benefit from individual wrapping before nesting. Here is how to approach each type:
- Standard bowls: Wrap each one individually in packing paper. Nest similar-sized bowls together with a sheet of paper between each. Pack right-side-up in small boxes.
- Mixing bowls and large glass bowls: Pack each one separately given their size and weight. Use bubble wrap for glass versions.
- Mugs: Stuff the inside of each mug with crumpled paper to protect the handle. Wrap the outside in packing paper and tuck handles inward when placing in the box.
- Fine china: Double-wrap each piece in packing paper, then add a layer of bubble wrap. Use cell dividers inside dish pack boxes to keep pieces separated. Never place other items on top.
“Fine china deserves its own box, full stop. Mixing it with heavier kitchen items — even just a set of mugs — is how heirlooms get chipped. Give valuable pieces the space and protection they earned.”
— Sarah Keane, Professional Relocation Specialist, JK Moving Services
How to Pack Glassware and Stemware Safely
Glassware is the most time-consuming part of any kitchen pack, and also the category where shortcuts hurt the most. Wine glasses and stemware have stems that can snap under the slightest lateral pressure, while mugs and tumblers can crack if packed too tight without cushioning.
Glasses and Cups
- Use a dish pack box with pre-inserted cardboard cell dividers, or create your own dividers from spare cardboard.
- Line the bottom with 2 to 3 inches of crumpled packing paper or bubble wrap.
- Stuff the inside of each glass with crumpled packing paper before wrapping the outside.
- Wrap glasses with at least two layers of packing paper, tucking the ends in and securing with tape.
- Place glasses right-side up in the box. Never stack glasses directly on top of each other.
- Fill every gap between glasses with crumpled paper so nothing moves.
- Add a top cushion layer of 2 to 3 inches of paper before sealing.
Do not: Stack glasses rim-to-rim or nest them together without padding. Even minor contact during a turn or a bump can cause micro-fractures that weaken the glass.
Delicate Stemware and Wine Glasses
Stemware requires special handling because the stem is both the most fragile point and the hardest to protect. These steps are non-negotiable for wine glasses, champagne flutes, and crystal:
- Stuff the bowl of the glass with crumpled paper for internal support.
- Wrap the stem separately in two or three layers of bubble wrap, securing with tape.
- Wrap the entire glass in packing paper from the base upward.
- Place stemware upside down in the box — this minimizes pressure on the delicate stem during transport.
- Use individual cell dividers so no two pieces touch directly.
- Pack stemware in the top half of boxes only, never on the bottom under heavier items.
“Stemware packed upside down survives moves far better than stemware packed upright. The base is the strongest part of the glass. Let it bear the load, not the stem.”
— David Tran, Lead Packer, Armstrong Relocation

How Do You Pack Pots, Pans, and Kitchen Appliances?
Pots and pans are more forgiving than glassware, but they still need protection to avoid scratched surfaces, dented lids, and broken handles. Small appliances require even more care because of fragile internal components and detachable parts.
Cookware and Lids
The most efficient approach for cookware is nesting with padding in between:
- Nest smaller pots inside larger ones with a sheet of packing paper or a folded dish towel between each to prevent scratches — especially important for non-stick surfaces.
- Pack lids separately in a small or medium box. Wrap glass lids individually in bubble wrap since they are far more fragile than the pots themselves.
- Heaviest cookware goes on the bottom of a medium box. Fill gaps with kitchen towels or mitts.
- Wrap cast iron pans individually in packing paper — their weight can crack lighter items placed nearby.
- Secure handles with stretch wrap or tape to prevent them from catching and bending during unloading.
Small Appliances (Blenders, Toasters, Coffee Makers)
Small appliances are best packed in their original boxes with the original foam inserts. If those are not available, here is the process:
- Remove all detachable parts (blades, trays, carafes, lids) and wrap each piece separately in bubble wrap.
- Wrap the main appliance in packing paper or a dish towel, with extra layers around any glass components.
- Use a sturdy medium box with at least 2 to 3 inches of padding on all sides.
- Pack only one appliance per box to avoid overloading and to prevent parts from cracking under weight.
- Tape cords neatly to the back of the appliance or place them in a labeled zip-lock bag inside the same box.
- Label: “Fragile — Appliance — [Name]” on all sides of the box.
Coffee makers and blenders deserve extra attention: remove carafes and glass containers and pack them in their own bubble-wrapped box. A common mistake is leaving the carafe inside the machine where it can rattle and crack during a sharp turn.
“We see mixer bowls crack every single move where they were left inside the base. Detach everything, wrap everything. It takes ten extra minutes and saves you from replacing a $60 bowl.”
— Mike Torres, Senior Moving Coordinator, Moving Place
What Should You Pack Last in the Kitchen?
The kitchen is one room you cannot fully pack until moving day arrives. You will need access to dishes, utensils, and your coffee maker right up until the truck shows up. Follow this priority order for the final 24 to 48 hours:
- Perishables and open pantry items: Use them up or give them away. Do not pack open food containers — they spill and attract pests. Donate non-perishable sealed items to a local Green Bay food bank.
- Daily dishes and utensils: Pack your everyday plates, cups, and silverware the morning of the move, right after breakfast. Keep one set per person accessible until the truck is loaded.
- Coffee maker and kettle: These are often the last appliances to be packed. Drain all water, wrap as described above, and place in a clearly labeled box near the door for easy loading and easy access on arrival.
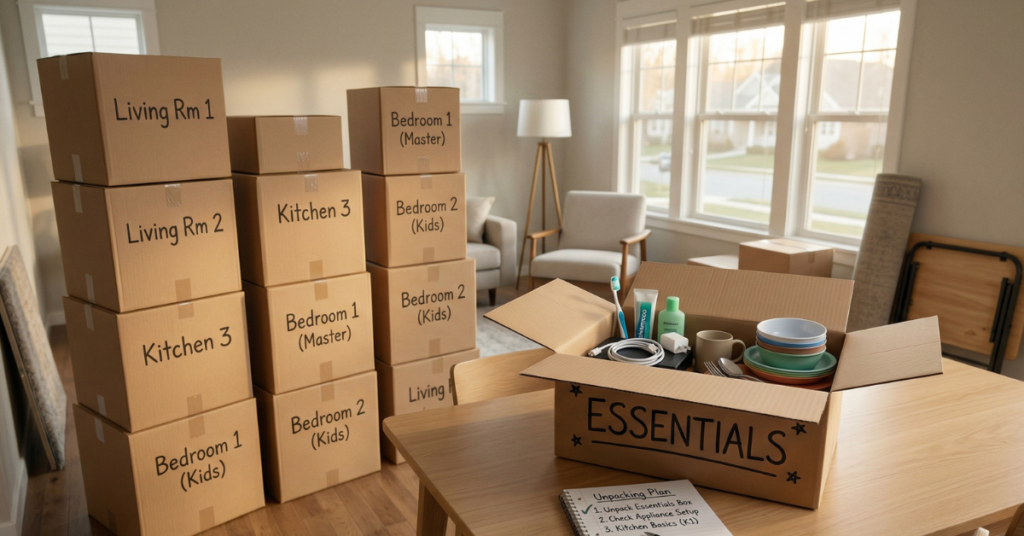
- Your Open-First essentials box: Pack a single box with one plate, one mug, and basic utensils per household member. Add dish soap, a sponge, a dish towel, and your coffee maker. This box goes into the truck last so it comes out first.
Using a room-by-room packing checklist keeps the kitchen from becoming chaotic in the final stretch. Pair it with box labeling tips that make unpacking faster so your new kitchen is functional within hours of arrival, not days.
Quick Reference: Kitchen Packing Cheat Sheet
| Item Type | Wrapping Method | Box Type | Special Notes |
| Dinner plates | 2 sheets packing paper | Dish pack (double-wall) | Pack vertically, not flat |
| Bowls | 1 sheet packing paper each | Small or medium | Nest similar sizes with paper between |
| Wine glasses | Bubble wrap on stem + paper | Dish pack with dividers | Pack upside down |
| Mugs | Paper, stuff inside first | Dish pack | Handles inward |
| Fine china | Double wrap + bubble wrap | Dish pack with dividers | Never mix with heavier items |
| Pots and pans | Paper or towels between | Medium | Nest, heaviest on bottom |
| Glass lids | Bubble wrap individually | Small, separate from pots | Most fragile part of cookware |
| Small appliances | Detach parts, wrap each | Original box or medium | One appliance per box |
Ready to Move Without the Stress? Let Green Bay Moving Co. Handle It
Packing a kitchen the right way takes time, the right supplies, and a system that you actually stick to. Even with the best preparation, it is a lot to take on alongside everything else a move demands.
Green Bay Moving Co. LLC offers professional packing services in Green Bay, WI — including full kitchen packing with all materials provided. Our crew has helped hundreds of Wisconsin families move their kitchens safely, from everyday dishware to heirloom china, without a single broken piece. Explore our packing and organizing tips from our crew for more insider advice, or check our complete moving checklists to stay organized from start to finish.
Call us today or request a free quote online. We are your trusted, licensed, and insured local movers in Green Bay — here to make your move as smooth as it can be.